
Unfortunately our machine is currently unavailale for rent until we get a new storage unit and have space! Please accept our apologies.
We know that there are quilters who would love to quilt their own quilts using a longarm quilting machine but don't have the space or funds to have their own machine at home. Some quilters would like to try before they buy a longarm. It is a great way to try before you buy or find out if this is a part of the quilting process that you would enjoy. Our Longarm Machine Rental Program allows you to rent time on our APQS Liberty in our shed studio.
After completing a class to learn all the basics of how to operate the machine and load your quilt, you are then free to rent it and start quilting your own quilts. We also recommend watching the following videos before you come, and as often as you need to before renting a machine.
How to use a Longarm Quilting Machine
Sparrow Quilt Co. https://www.youtube.com/watch?v=pEGU_3KhgO8 Machine Quilting Pre-rental class – 2hrs $50 + materials
This 2 hour class is a beginner hands-on, class taught on our Liberty Longarm stitch-regulated machine. You will learn how to prepare your top, batting and backing, attach zippers, load your quilt, and the basics of using the machine. We will also cover using basic free-style movements and how to quilt an overall pattern using a pantograph: how to set them up on the machine, rolling the quilt using the pattern and following the pattern. By the end of the class you will be able to quilt an overall design on your quilt. Keep in mind that this first quilt will not be without flaws ;). But learning to longarm will be fun!
Requirements list: This will be provided and cost split between class members. (approx $60).
- Backing fabric at least 3” larger on all sides to the quilt top. It is much nicer to have a patterned backing fabric to hide imperfections in your quilting.
- Batting at least 4” larger than your quilt top on all sides.
- Thread suitable to use in a longarm machine with top & bottom colours to be a similar tone to minimize pokies/bad tension issues.
The steps you need to learn to get started on using a longarm machine.
1. How to square your backing fabric.
2. How to attach backing fabric to zippers.
Load onto machine.
4. Load batting – baste horizontal line across top of batting
5. Measure & determine quilt top sizes.
6. Float quilt top & pin to centre of backing. Stitch from centre to each side ensuring top is kept at correct width.
7. Baste sides from belly bar up to take up roller. Pin baste across the width to keep all horizontal seam lines parallel to top roller.
8. Place tape on top roller & mark centre & sides to keep the quilt top aligned straight & at the correct width.
9. How to change a needle.
10. How to change a bobbin.
11. How to change a top thread.
12. How to test your tension & tweak it.
13. How to take a single stitch to bring the bobbin thread to the top of the quilt sandwich.
14. Starting & stopping stitching on quilting to have a nice ‘look’ on your quilt. Explanation of the different methods of doing this & when it is appropriate to use each one.
Machine rental 2 hr minimum
$20 per hour + $25 zipper deposit.
Zipper deposit: includes one set of zippers on loan, one new needle (to keep). $20 refund will be given on return of zippers in perfect condition – no basting threads evident.
*Minimum rental is 2 hours. A 50% deposit is required to reserve rental time. Deposit is refundable if cancellation is made more than 24 hours before reserved time.
Our rental sessions include:
1) Omni Quilting Thread- We have a rainbow of solid color threads for you to choose from.
2) Prewound Bottomline bobbin
3) Paper Pantographs- Select one of our many paper patterns and trace the design with the machine’s laser light. Or, drive the quilt machine freehand and let your doodles come to life!
4) APQS Liberty longarm quilting machine with a stitch regulator & easy to use controls. Our machine is a workhorse, not so many bells and whistles but enough to get you a great result without being fussy.
5) Zippers on loan to preload your quilt back
6) One new needle - yours to keep
7) Our machine will be cleaned, oiled and ready for you to start. Your charges start at the time of your reservation. We recommend that you plan to arrive early enough to pick out patterns, etc. before your rental starts.
8) Our shop is open from 10-4 M-F. You must remove your quilt from the machine and be ready to leave the shop by closing time unless we have worked out something different ahead of time
9) Use of the cutting table to square-up your batting and backing before quilting, or to trim your quilts after you are finished quilting, but please bring your own rotary cutter.
10) You are responsible for cleaning up after you have finished your session, including picking up loose thread, putting away tools, thread spools and general tidying up.
Preparing Your Quilt For Rental
During your Pre-Rental Class you’ll be taught how to use our zipper system on our machines which will greatly speed up your loading time. You will be loaned a set of zippers (with deposit) to use throughout the quilting of your quilt. Alternatively you may purchase a set.
The reason you’d want to use zippers is so you can load your backing fabric to the zippers at home and just zip on your back when you get to the shop rather than using up your rental time pinning. Plus, if you don’t get finished you can unzip your quilt and bring it back a different day to get going again.
We also offer a concierge service if you’d rather have us load your quilt to the frame so it is all set up and ready for you to just come in and start quilting. That service is $30 and you’d need to drop everything off at least 24 hours prior to your rental.
BACKING FABRIC:
We use a zipper system on our longarm machine. Read the tutorial below, Or watch this video Loading Backing on to zippers Ginny Hildreth https://www.youtube.com/watch?v=z-2g20lYyfo
1) Prepare Backing Fabric For Zippers:
-Make the backing fabric 8″larger than the quilt top. For example, if your quilt is 50×50, you need a backing at least 58″ x 58″
-Square up backing fabric on all sides. The best way to do this is snip a little cut in the fabric and rip it. That is the best way you know you’ve got the fabric on grain and square.
-Identify which side of your backing is going to be pinned to zippers. If your pattern and/or quilt are not directional, it is always preferable to load your quilt longways against the zippers to minimize the number of fabric advances you must take while quilting.
-Fold top and bottom edge of backing in half with wrong sides together and mark the centre of both top and bottom edges, using a non-bleeding fabric marking pen or chalk.
2) Pin Zippers to Backing Fabric:
All of our zippers are marked. Separate them and find the zipper marked top backing fabric.
top Edge of Backing Fabric:
-Lay backing fabric flat on table, with wrong side face-up, and bottom edge closest to you.
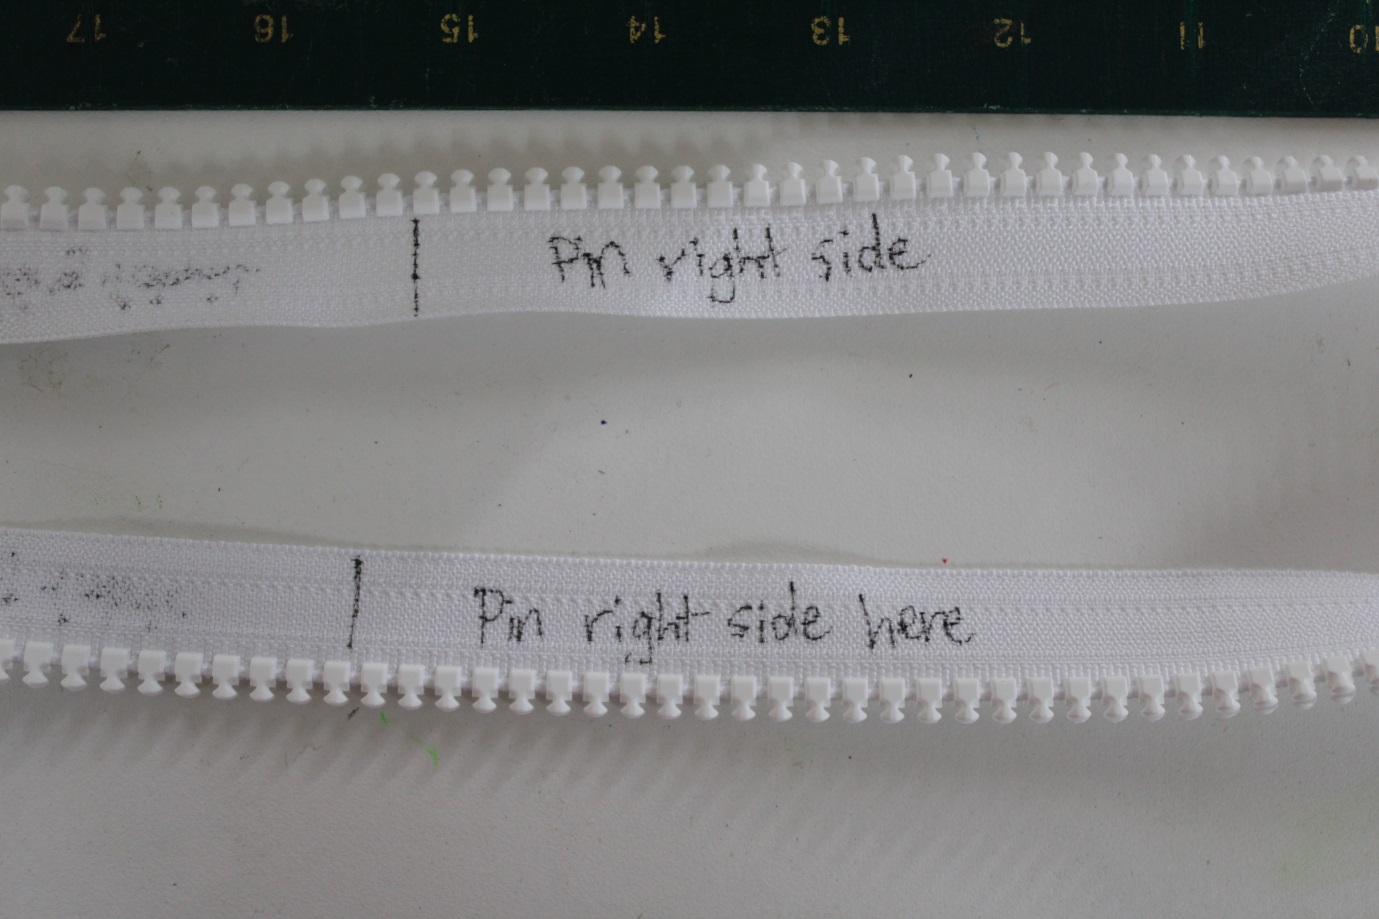
-Take the zipper marked “top backing fabric” and place zipper under backing fabric so the backing fabric’s “right” side is against the side of the zipper flange that says pin right side here.


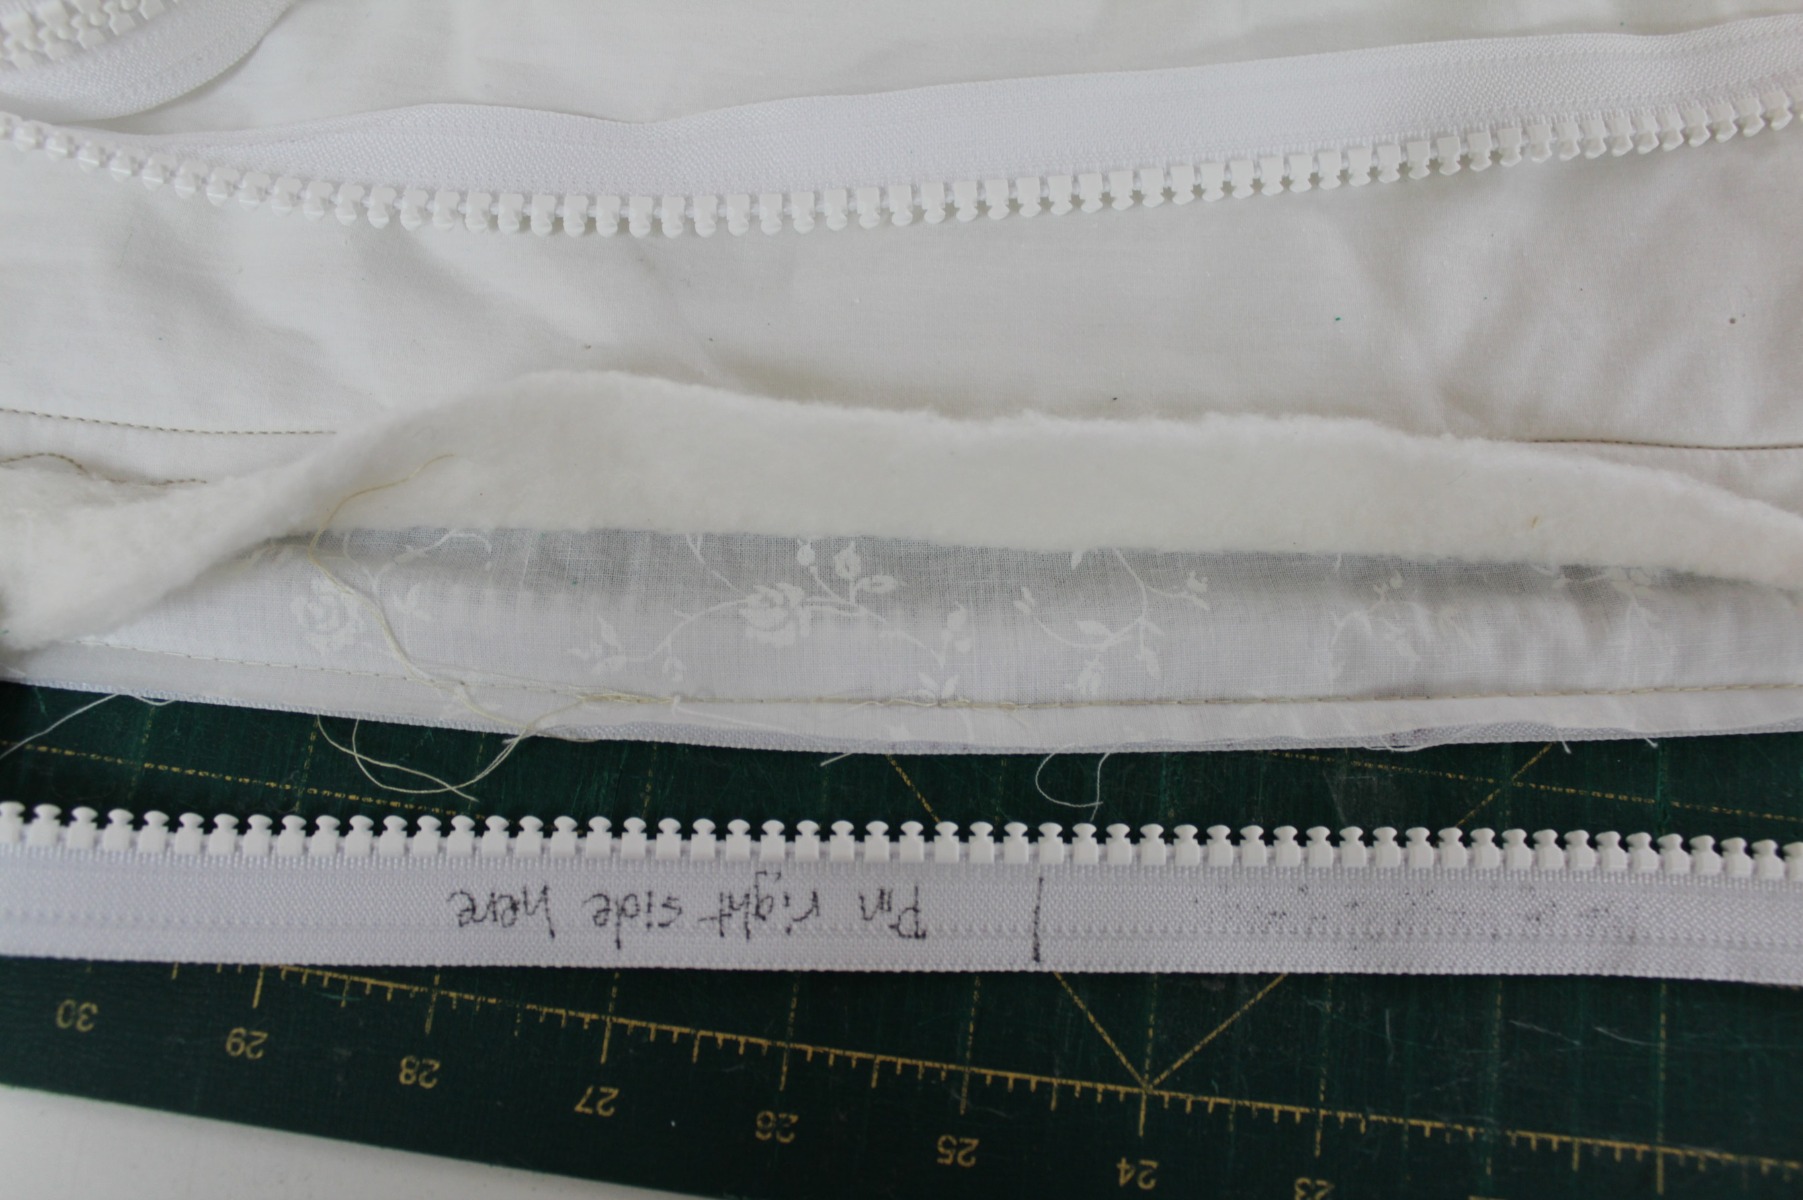
-Line up the centre mark of the backing fabric with the black centre mark of the zipper,
Bring the right side of the backing fabric over the top of the zipper (zipper teeth will be under) and pin together, having the fabric even with the straight (no teeth) edge. Place pins perpendicular to the teeth. You can then stitch right over them using your domestic sewing machine and a line of big basting stitches. Use a 5.0 size stitch length and you’ll be able to just snip and pull the zippers off when you are done.
– The side of the zipper with the Dark centre mark should be facing up towards the backing fabric, and the zipper teeth should be facing away from the fabric edge.
-Place one pin in the centre, then pin the zipper to the fabric, placing pins 1” to 1-1/2” apart. Pin from the centre out in one direction until entire side is pinned to zipper.
-Make sure to keep fabric an even 1/8″ away from teeth as you pin, to maintain a straight edge.
-After pinning from the centre out on one side, move back to the centre and repeat. Now stitch using the edge of your ¼” foot against the teeth. Stitch over pins or remove them as you sew.
Top Edge of Backing Fabric:
-Once the zipper is stitched to the bottom edge, turn the backing fabric so that the top edge is nearest to you.
-Backing fabric should still be flat on the table with the wrong side face-up, and now the top edge is closest to you.
-Take the zipper marked “bottom backing fabric”. In same manner as above for top edge of backing, pin zipper to top edge.
-Remember to have the Dark centre mark of the zipper facing up towards the backing fabric, and the zipper teeth should still be facing away from the fabric edge.
-Place one pin in the centre, then move out to one side at a time in the same manner as for the backing top edge, being sure to maintain 1/8″ inch distance from zipper teeth. Stitch as before.
BATTING:
-We sell 2-3 different kinds of batting and would prefer you purchase your batting at the shop. There are some battings that are too fragile to use on the frame- Mountain Mist brand, Fairfield brand and the cheaper generic brands at Spotlight. You are welcome to bring batting in for your rental but it needs to be good quality to put up with the shifting and straightening we must do on the frame. You have put a lot of effort and dollars into your quilt top, don’t skimp on your batting and backing fabric now.
-If using packaged batting, remove batting from package and open up, spreading out to remove any deep folds. Lay out on a bed or flat surface overnight to allow folds to relax. Batting may also be placed in dryer on low to help remove creases.
-If using packaged batting, cut batting so that it is approximately the same size as your backing fabric-6 inches larger than the quilt top on all sides. Removing any excess batting over the 6 inches on the side edges will allow easier loading with the side clamps. Please note that it’s ok to have excess batting from top to bottom, because the extra can just hang on the bottom when we load it on to the machine frame, and will be trimmed off later.
-If you are going to purchase your batting at the shop when you come in, we sell it off the bolt by the 1/4 m.
We offer the following batting choices off the roll sold by the 1/4 m:
Hobbs Heirloom Premium 80/20 Cotton/Poly blend 96″ width
Hobbs 100% wool 108″ width
Matilda's own 60/40% wool poly 108" width
Suggested time allotments for longarm rentals
(based upon large, open, low density quilting like meandering):
Baby Quilt = 2 hours
Lap Quilt = 2 hours
Twin Quilt = 3 hours
Full Quilt = 4 hours
Queen Quilt = 5 hours
King Quilt = 7 hours